Week 3: Programming Servo with Arduino Summary In...
Read MoreIn Week 2, students will learn how to connect multiple LEDs to an Arduino and program it to blink. They will gather the necessary components, identify LED pins, wire the LED on a breadboard, write and upload a simple Arduino sketch to control the LED, and test the blinking functionality.
- Students should demonstrate their working LED circuits.
- They should show the LED blinking on and off every second.
- They should be able to explain the wiring connections, the code functionality, and how the code controls the LED’s behavior.
- Active participation in discussions and hands-on activities.
- Adherence to safety protocols.
- Respectful collaboration with peers.
- Review of Week 1
- Blinking an LED
- Connecting Multiple LEDs
- Programming Multiple LEDs
- Practice Session
- Questions
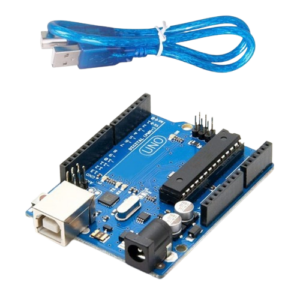
- Arduino Board
- Function in Project: Acts as the main microcontroller to run the program and control the LED.
- Other Real-life Uses: Can be used in robotics, home automation, weather stations, and many other DIY electronic projects.
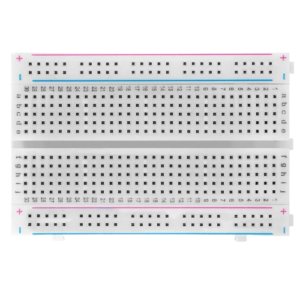
- Breadboard
- Function in Project: Provides a platform to build and test circuits without soldering.
- Other Real-life Uses: Useful for prototyping circuits in electronics development and for educational purposes.
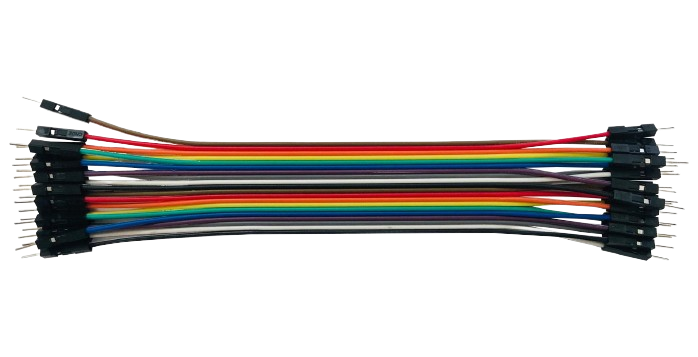
- Jumper Wires
- Function in Project: Connect different components on the breadboard and to the Arduino.
- Other Real-life Uses: Used for making temporary connections in testing and prototyping electronic circuits.
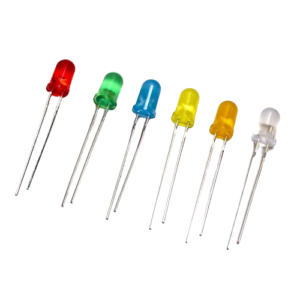
- LED Bulbs
- Function in Project: Used to visually demonstrate the output of the Arduino program by lighting up.
- Other Real-life Uses: LEDs are used in various applications, such as indicator lights, displays, lighting, and decorations.

- Computers with Arduino IDE Installed
- Function in Project: Used to write, compile, and upload programs to the Arduino board.
- Other Real-life Uses: Computers with development environments are essential for programming, software development, and interfacing with various hardware devices.
Light Bulbs
LED Connection
The LED has two legs:
Anode (longer leg): Positive connection
Cathode (shorter leg): Negative connection
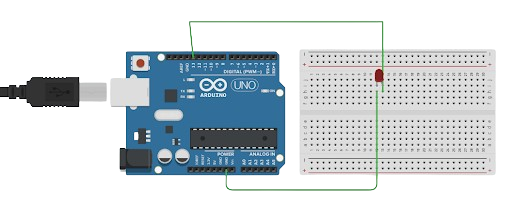
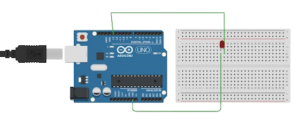
- Place the LED on the breadboard.
- Connect a male to male jumper wire to the anode (long leg) of the LED.
- Connect the other end of the jumper wire to digital pin 13 on the Arduino.
- Connect the cathode (short leg) of the LED to the GND pin on the Arduino using a jumper wire.
- Open a new sketch in the Arduino IDE.
- Enter the following code in the new sketch to program an LED to blink on and off
// Define the LED pin
int ledPin = 13;

void setup() {
  // Initialize the LED pin as an output
  pinMode(ledPin, OUTPUT);
}

void loop() {
  // Turn the LED on
  digitalWrite(ledPin, HIGH);
  // Wait for 1000 milliseconds (1 second)
  delay(1000);
  // Turn the LED off
  digitalWrite(ledPin, LOW);
  // Wait for 1000 milliseconds (1 second)
  delay(1000);
}
Connect and control multiple LEDs using a breadboard and Arduino.
Steps:
- Connect the first LED:
- Connect the positive lead of the LED to digital pin 13 on the Arduino.
- Connect the negative lead of the LED to GND on the Arduino.
- Connect the second LED:
- Connect the positive lead of the second LED to digital pin 12 on the Arduino.
- Connect the negative lead of the second LED to GND on the Arduino.
- Repeat for additional LEDs as needed (e.g., digital pin 11, 10, etc.).
- Connect the first LED:
Write and upload a simple code to control multiple LEDs.
Steps:
-
-
- Open the Arduino IDE: Launch the Arduino IDE on your computer.
- Enter the Code: Type the following code into the IDE to control multiple LEDs:
-
// Define the LED pins
int ledPin1 = 12;
int ledPin2 = 13;

void setup() {
  // Initialize the LED pins as outputs
  pinMode(ledPin1, OUTPUT);
  pinMode(ledPin2, OUTPUT);
}

void loop() {
  // Turn on the first LED
  digitalWrite(ledPin1, HIGH);
  delay(1000); // Wait for 1 second

  // Turn off the first LED and turn on the second LED
  digitalWrite(ledPin1, LOW);
  digitalWrite(ledPin2, HIGH);
  delay(1000); // Wait for 1 second


 // Turn off the second LED
 digitalWrite(ledPin2, LOW);
 delay(1000); // Wait for 1 second
Upload the code to the Arduino board and observe the LEDs blinking alternately.Connect 3 or more LEDs and program them to blink.