Week 3: Programming Servo with Arduino Summary In...
Read MoreIn Week 1, students will explore the Arduino board and its components while learning basic electronics principles. They will set up the Arduino IDE and gain hands-on experience with programming. By building a simple LED circuit on a breadboard, students will apply their knowledge of electronics. This week will establish a solid foundation in both hardware and software for Arduino projects.
- Active participation in discussions and hands-on activities.
- Timely completion of assignments.
- Demonstrated understanding of hardware and software aspects of Arduino.
- Adherence to safety protocols.
- Respectful collaboration with peers.
- Introduce students to the microcontroller – Arduino and its parts
- Setting up Arduino IDE
- Connecting a Single LED
- Arduino programming language (based on C/C++)
- Programming the LED to light up
- Connect the Arduino to Your Computer
Practice Session
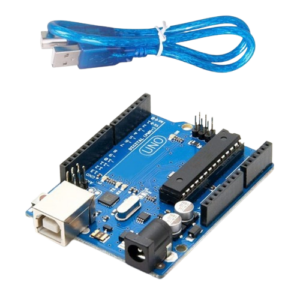
- Arduino Board
- Function in Project: Acts as the main microcontroller to run the program and control the LED.
- Other Real-life Uses: Can be used in robotics, home automation, weather stations, and many other DIY electronic projects.
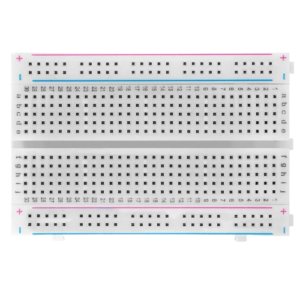
- Breadboard
- Function in Project: Provides a platform to build and test circuits without soldering.
- Other Real-life Uses: Useful for prototyping circuits in electronics development and for educational purposes.
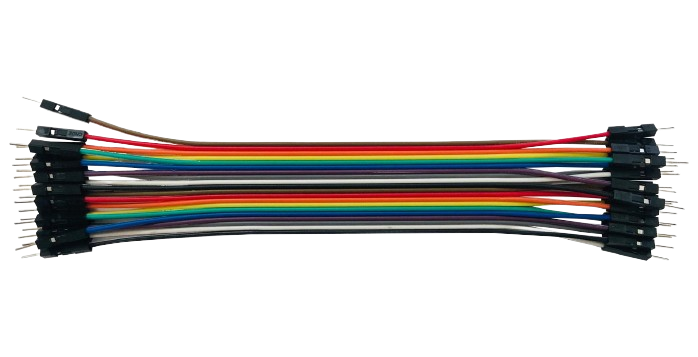
- Jumper Wires
- Function in Project: Connect different components on the breadboard and to the Arduino.
- Other Real-life Uses: Used for making temporary connections in testing and prototyping electronic circuits.
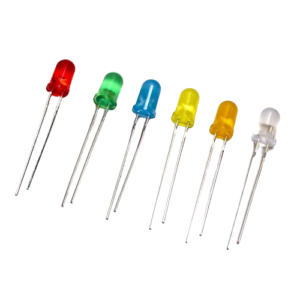
- LED Bulbs
- Function in Project: Used to visually demonstrate the output of the Arduino program by lighting up.
- Other Real-life Uses: LEDs are used in various applications, such as indicator lights, displays, lighting, and decorations.
- Computers with Arduino IDE Installed
- Function in Project: Used to write, compile, and upload programs to the Arduino board.
- Other Real-life Uses: Computers with development environments are essential for programming, software development, and interfacing with various hardware devices.
What is an Arduino?
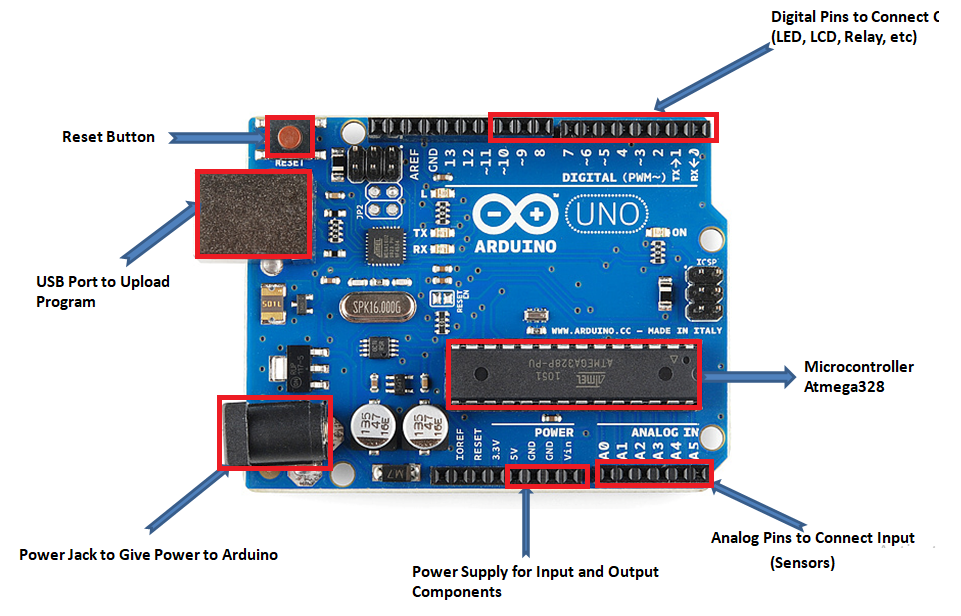
An Arduino board is like a tiny computer that helps you control electronic devices. It’s very popular for making cool projects like robots, alarms, and games. Let’s break down its main parts:
- Power Pins:
- 5V and 3.3V: These pins provide power to your sensors and other components. 5V and 3.3V are different voltage levels that you can use depending on what your components need.
- GND (Ground): These pins are used to complete the circuit. Think of them as the return path for electricity back to the Arduino.
- Digital Pins:
- These are numbered pins (like 0, 1, 2, etc.) that can be used for digital input or output. Digital means they can be either ON (1) or OFF (0). You can connect things like LEDs, buttons, and sensors to these pins.
- Analog Pins:
- These pins are labeled A0, A1, A2, etc. They read varying signals from sensors. For example, if you’re using a light sensor, it might send different signals depending on how bright or dark it is, and the analog pins can read these varying signals.
- USB Connection:
- This is where you plug in a USB cable to connect the Arduino to your computer. The USB connection is used to upload your code (the instructions for your project) to the Arduino. It can also power the Arduino.
Each part of the Arduino board has a special job that helps you control and interact with the electronic components in your project. With these parts working together, you can create all sorts of fun projects.
- Open your web browser and go to the Arduino official website: www.arduino.cc.
- On the Arduino homepage, hover over the “Software” tab in the top menu.
- Click on “Downloads” from the dropdown menu.
- On the Downloads page, you will see several download options for different operating systems.
- Select the version of the Arduino IDE that corresponds to your operating system (Windows, macOS, Linux).
- Click on the download link for your operating system.
- After clicking the download link, you will be redirected to a donation page. You can choose to donate or click “Just Download” to proceed without donating.
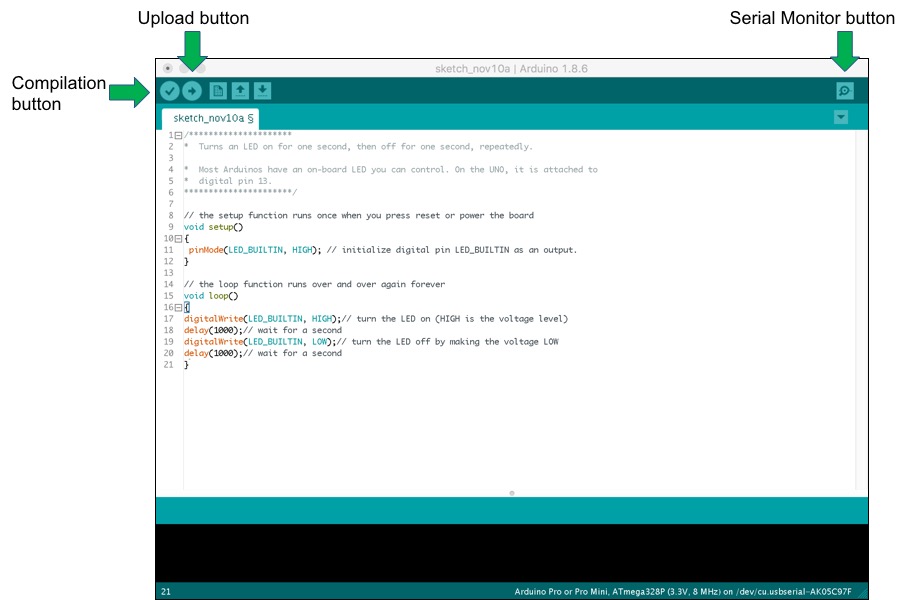
- When the Arduino IDE opens, you should see a window with a blank sketch. This confirms that the installation was successful.
- For some Arduino boards, you may need to install additional USB drivers. Follow the instructions provided on the Arduino website for your specific board if you encounter connection issues.
You’re now ready to start using the Arduino IDE to program your Arduino boards!
Light Bulbs
LED Connection
The LED has two legs:
Anode (longer leg): Positive connection
Cathode (shorter leg): Negative connection
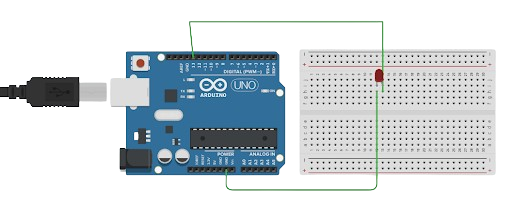
- Place the LED on the breadboard.
- Connect a male to male jumper wire to the anode (long leg) of the LED.
- Connect the other end of the jumper wire to digital pin 13 on the Arduino.
- Connect the cathode (short leg) of the LED to the GND pin on the Arduino using a jumper wire.
- Setup and Loop: Every Arduino program has two main parts: setup() and loop().
- setup(): This is like the opening scene of a play. It happens only once at the very beginning and sets everything up.
- loop(): This is like the main action that happens over and over again, like when you play your favorite song on repeat.
- Open a new sketch in the Arduino IDE.
- Enter the following code in the new sketch
// Define the LED pin
int ledPin = 13;

void setup() {
  // Initialize the LED pin as an output
  pinMode(ledPin, OUTPUT);
}

void loop() {
 // Turn the LED on
  digitalWrite(ledPin, HIGH);
}
Connect 2 or more LEDs and program them to light up in sequence.