Week 5: Programming Robot Sequences with Blinking LEDs...
Read MoreIn Week 4, students will extend their knowledge to control multiple motors using the L298N Motor Driver. This week will involve programming to drive four motors, exploring more complex movement patterns and functionalities. The focus will be on understanding motor control setups.
- Complete the motor control project by the end of the week.
- Demonstrate understanding of controlling multiple motors with L298N.
- Ensure correct wiring and programming for multi-motor setups.
- Adhere to safety protocols.
- Collaborate respectfully with peers.
- Review of Week 4
- Connecting 2 Motors to L298N
- Connecting and Programming 4 Motors
- Programming and Testing Movement Patterns
- Practice Session
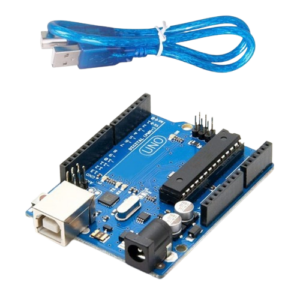
Arduino Board
- Function in Project: Acts as the main microcontroller to run the program and control the LED.
- Other Real-life Uses: Can be used in robotics, home automation, weather stations, and many other DIY electronic projects.
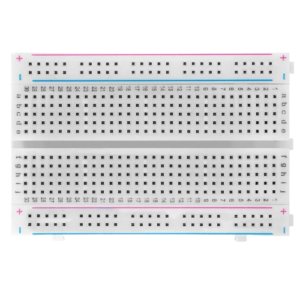
Breadboard
- Function in Project: Provides a platform to build and test circuits without soldering.
- Other Real-life Uses: Useful for prototyping circuits in electronics development and for educational purposes.
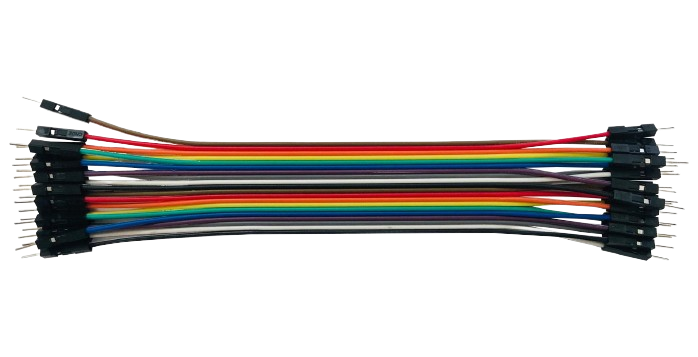
Jumper Wires
- Function in Project: Connect different components on the breadboard and to the Arduino.
- Other Real-life Uses: Used for making temporary connections in testing and prototyping electronic circuits.
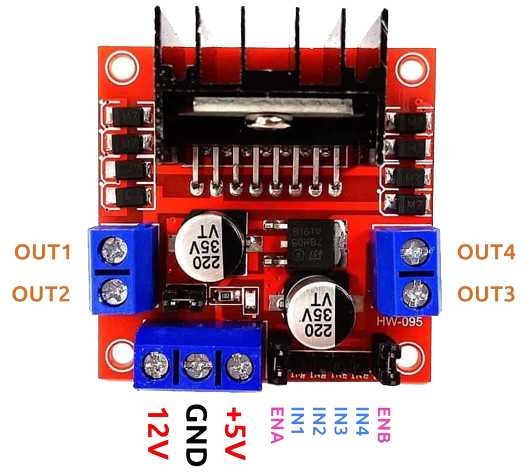
L298N Motor Driver
- Function in Project: Controls the speed and direction of the motor.
- Other Real-life Uses: Used in various robotics and motor control applications to drive DC and stepper motors.
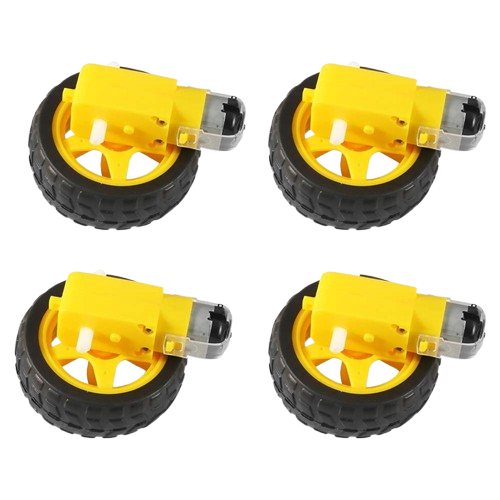
Gear Motors
- Function in Project: Converts electrical energy into mechanical movement to drive the robot forward.
- Other Real-life Uses: Used in fans, toys, and various mechanical devices requiring rotary motion.
Objective:
Recap the use of L298N with a single motor and review key concepts
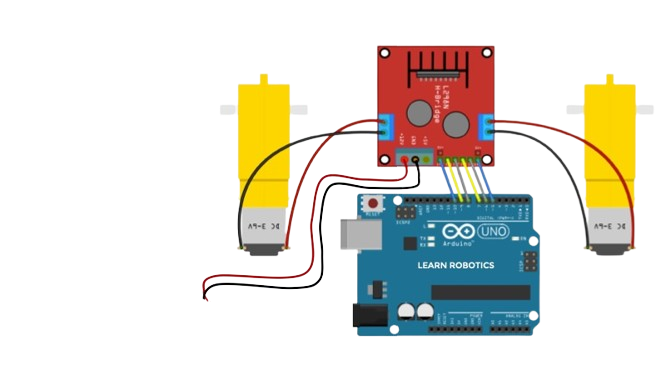
Connect the L298N motor driver to the Arduino and the DC motor.
Steps:
- Connect EnA to pin 3 on the Arduino.
- Connect In1 to pin 4 on the Arduino.
- Connect In2 to pin 5 on the Arduino.
- Connect In3 to pin 6 on the Arduino.
- Connect In4 to pin 7 on the Arduino.
- Connect EnB to pin 8 on the Arduino.
- Connect the motor terminals to the output pins of the L298N motor driver.
- Connect the power supply to the motor driver and the Arduino.
Objective:
- Wire up 2 DC motors to the L298N Motor Driver.
Steps:
- Connect the motors to the OUT1, OUT2, OUT3, and OUT4 terminals on the L298N.
- Connect IN1, IN2, IN3, and IN4 to Arduino digital pins.
- Connect ENA and ENB to Arduino PWM pins or directly to 5V (for full speed).
Objective:
- Wire and program 4 DC motors using L298N.
Steps:
- Left Motors: Connect the two motors on the left to OUT1 and OUT2 terminals.
- Right Motors: Connect the two motors on the right to OUT3 and OUT4 terminals.
Additional Connections:
- Connect EnA, EnB, IN1, IN2, IN3, and IN4 to Arduino digital pins for control.
#include <RoboticCar.h>
int EnA = 3;
int In1 = 4;
int In2 = 5;
int EnB = 6;
int In3 = 7;
int In4 = 8;
RoboticCar myrobot(In1, In2, In3, In4, EnA, EnB);

void setup() {}

void loop() {
  myrobot.forward(200);
  delay(2000);
  myrobot.stop();
  delay(2000);
  myrobot.reverse(200);
  delay(2000);
  myrobot.stop();
  delay(2000);
}
Objective:
- Implement and test different motor control patterns.
- Refine the robot’s motor control performance through experimentation.
Activity:
- Program various movement sequences such as turning, spinning, and coordinated actions with all 4 motors.
- Test the robot with different sequences and adjust the code for optimal performance.